 Ships USA-wide

Installation guide
Most glue-down cork tile failures come from substrate moisture, wrong adhesive handling, poor transfer, skipped rolling, or rushing the dry-stick process.
Use this page when
- You are installing glue-down cork tile.
- You want to understand why cork tiles curl, gap, or lift.
- You are troubleshooting a failed or questionable installation.
Before you start
- Confirm moisture and substrate conditions before adhesive is opened.
- Follow the correct wet/dry adhesive timing for the specified product.
- Roll tiles properly and plan finish/cure timing.
Important
- Do not treat adhesive timing as optional.
- Do not use the wrong adhesive or wrong spread method.
- Do not install when moisture or substrate issues are unresolved.
Related resources
Cork tile installation guide
Use the full installation guide after reviewing failure prevention.
Match cork adhesive
Confirm the correct adhesive before installation.
Request project help
Ask for help before proceeding if the subfloor or adhesive step is uncertain.
Detailed instructions
Cork flooring is one of the most durable and long-lasting options available—when installed correctly. Historic sites like the U.S. Library of Congress and European cathedrals still feature original cork floors that have endured for centuries. Yet, if your cork tiles are curling at the edges, lifting in corners, or developing gaps, the problem almost always comes down to one critical mistake: improper adhesive application.
The #1 Cause of Cork Flooring Failure: Not Letting the Glue Dry
Wet Stick vs. Dry Stick – The Biggest Misunderstanding
80% of cork flooring failures happen because installers don’t realize that water-based contact cement requires a “dry stick” method, not a “wet stick.”
-
❌ Wet Stick (Wrong Method): Applying adhesive and immediately placing the tiles (like with ceramic or vinyl).
-
✅ Dry Stick (Correct Method): The glue must dry completely before installing the cork tiles.
What Happens If You Don’t Wait?
-
The adhesive stays wet underneath, allowing the bottom of the tile to absorb moisture and expand.
-
The top of the tile stays dry, creating uneven tension.
-
The result? Curling edges, lifting corners, and gaps within days.
How Long Should You Wait?
-
Let the adhesive dry until it’s barely tacky to the touch.
-
It should not feel wet or stick to your fingers at all.
-
This can take 30-60 minutes (or longer in humid conditions).
Contact adhesive bonds on contact. Align each tile carefully before pressing it into place.
Other Common Causes of Cork Flooring Failure
1. Using a Trowel Instead of a Roller
Many contractors use a trowel (standard for ceramic tile), but this causes:
-
Too much glue, leading to extended drying times (hours or even days).
-
Uneven adhesive spread, creating weak spots that lift.
✅ Solution:
-
Use a roller (not a trowel) for thin, even application.
-
Apply adhesive to both the subfloor AND the back of the cork tiles—coating only one side is insufficient.
2. Subfloor Moisture (Especially in Basements)
Cork glue-down tiles should not be installed in basements unless moisture is controlled.
Why?
-
Concrete releases moisture and alkaline salts, which break down adhesives.
-
Liquid moisture barriers often fail—if the subfloor has high moisture, floating cork flooring is the better choice.
✅ Solution:
-
For basements, use floating cork planks with a click-lock system.
3. Installing Over the Wrong Subfloor
Glue-down cork requires a clean, stable subfloor. Avoid installing over:
-
❌ Existing ceramic tile
-
❌ Vinyl flooring
-
❌ Chipboard (OSB)
Reason: Contact cement won’t bond properly to these surfaces.
✅ Solution: If your subfloor isn’t suitable, choose floating cork flooring instead.
4. Using the Wrong Adhesive
Not all adhesives work for cork. We recommend:
-
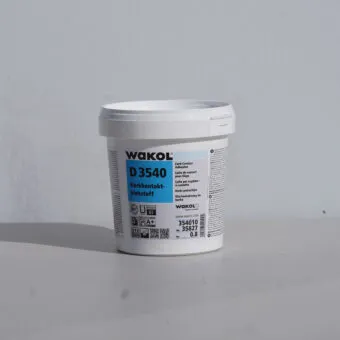
Wakol D3540 (water-based)
-
3M 30NF Green Fastbond Contact Adhesive
Using the wrong glue guarantees failure.
How to Fix a Failed Cork Floor
If your tiles are already curling or lifting:
-
Remove the affected tiles carefully.
-
Scrape off old adhesive and sand the subfloor smooth.
-
Reinstall with proper contact cement, following the dry-stick method.
⚠️ Warning: Trying to “fix” curled tiles without removing them usually makes the problem worse.
Final Advice: Install It Right the First Time
Cork flooring is incredibly durable—if installed correctly. The key takeaways:
✔ Let the adhesive dry completely before installing (dry-stick method).
✔ Use a roller—never a trowel—for glue application.
✔ Avoid glue-down in basements; use floating floors instead.
✔ Only install over plywood or clean concrete—not tile, vinyl, or chipboard.
✔ Use the right adhesive (Wakol D3540 or 3M 30NF).
Follow the cork floor’s preparation, expansion-gap, adhesive and maintenance requirements. Installation quality and room conditions affect the floor over time.
Need help? If your installer isn’t familiar with cork, make sure they read the manufacturer’s instructions carefully. Mistakes are expensive to fix—doing it right the first time saves time, money, and frustration.
 Flooring
 Wall & Ceiling Tiles
 Cork Underlayment
 Supplies & Guides