 Ships USA-wide

Installation guide
Use this guide for click-lock floating cork planks installed over a clean, flat, dry substrate with the correct underlayment and expansion space.
Use this page when
- The product is a floating or click-lock cork floor.
- The room is a dry interior space where a floating floor is appropriate.
- You need tools, layout, expansion, tapping, and maintenance instructions.
Before you start
- Confirm the product is floating, not glue-down tile.
- Check subfloor flatness, dryness, underlayment, expansion gaps, and acclimation requirements.
- Inspect all boxes before installation and mix planks from several cartons if instructed.
Important
- Do not glue a standard floating floor unless the product guide specifically allows it.
- Do not install over an uneven or damp substrate.
- Do not pin cabinets, islands, or heavy fixed objects through a floating floor.
Related resources
View floating cork floors
Browse products that use click-lock floating installation.
Choose underlayment
Match underlayment thickness and acoustic requirements before installation.
Compare other installation guides
Use glue-down, kitchen, wall, or finish guides when those conditions apply.
Detailed instructions
Use this section for the full floating cork floor installation procedure. It restores the detailed rules for expansion gaps, kitchens, subfloor preparation, doorway trimming, plank layout, spacer use, row installation, last-course fitting, and required tools.
IMPORTANT READ BEFORE INSTALLING Cork Flooring
Understanding floating floors – Rules to know by heart.
***Floating floors are not to be installed in bathrooms***
***If you choose to seal your floor which we highly recommend, please use 1-2 coats (2 coats must be used in kitchens for warranty) of our water based polyurethane Loba 2K Supra or Rigo Step (No Substitutions)***
A floating floor is a floor that is not anchored to the subfloor – nor anchored underneath kitchen cabinets. It is a floor that requires expansion and contraction. It requires expansion gaps be ADHERED TO without fail – or your floor will surely fail.
iCork Floor highly recommends that any/every traditional cork floor receives 2 coats of appropriate polyurethane at the time of installation. Forna cork floors require use of the Loba finishes. Please contact your Forna representative for more information. Sealing is not required for Fusion Floors.
Failure to follow these guidelines will void your warranty.
Rules to a Forna Floating floor:
Consult a professional prior to any Do-it-Yourself project
Subfloor must be clean, dry, flat and sound and of a “hard surface”
- The allowable difference in floor height is an industry standard:
- a. 3mm height difference over a length of 3 feet
b. If the floor has more than this, it MUST BE REPAIRED
Floating floors MUST HAVE EXPANSION GAPS of nothing less than ½ inch (the thickness of the floor is the MINIMUM expansion gap required) - Floor expanses measuring MORE THAN 25 FEET in length:
a. Expansion gap MUST BE INCORPORATED to reduce continuous floor lengths of LESS THAN 25 LINEAR FEET.
b. If the floor is slightly longer than 25 feet (for example, 32 feet), increase the expansion space at both ends to 1 inch. This requires wider wall trim.
c. Expansion gaps, OR TRANSITIONS, must be used through doorways.
Rules for Forna Floating flooring in a kitchen:
Consult a professional prior to starting any DIY kitchen remodeling
- A floating floor CAN NOT run underneath cabinetry
- Cork floating floors MUST BE the last thing to be installed in a kitchen.
- Incorporate the height of your floor INTO the total height of counter tops
a. Under-counter dishwashers require a height clearance – make sure you have accounted for the height of the cork floor and underlay before installing cabinets/counter tops - Paint the walls, lay the counter top, install the backsplash BEFORE laying
- Measure and trim “toe kicks” prior to installing flooring
- Apply 2 coats of water based polyurethane once the floor has been installed.
1, Prepare to install cork floor
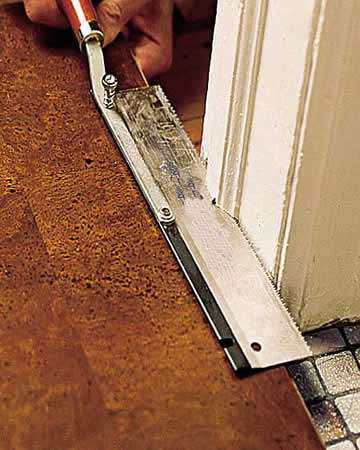
Look for any vertical trim that will need to be cut away to allow the new flooring to slide beneath it. At doorways, place a cork plank atop the saddle (the threshold) and butted to the door stops. Using a flush-cutting backsaw, trim the stops, but not the jambs, on either side of the door above the saddle. Carefully pry up the saddle before installing the flooring. Also cut the casings on the wall around the door, using a cork plank to judge how much to trim them.
In a kitchen installation, remove the cabinet toekicks if possible so you can run the cork under the cabinets. If the kick is stationary, plan to install the flooring up to within 1/2 inch of the toekick. This gap can be hidden in the finish step.
Installation over concrete, such as in a basement, requires the removal of any baseboard so you can cover the slab with 6-mil polyethylene sheeting and run it 3 inches up the wall. Overlap the sheeting’s seams by 8 inches and seal them with tape.
2. Trim the doorway moldings
After carefully sawing through each doorstop, pull away the cork-floor plank and
remove the waste piece of wood. Then, pry up the saddle before installing the cork flooring. Also, use the backsaw to trim the casings on the wall around the door. Again, use a cork plank as a guide to judge how much of the casings you need to trim away.
3. Trim the planks for the first course
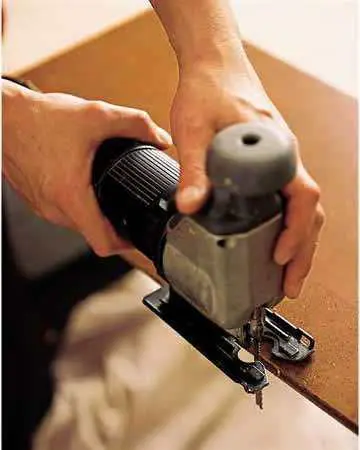
Start laying the planks along the longest uninterrupted wall. Measure the distance between it and the opposite wall, then subtract 1 inch for expansion.
Divide the remainder by the width of a cork plank to calculate the number of courses needed to cover the floor.
If the last course ends up being less than half a plank, you’ll need to cut the first and last courses narrower to balance the layout. Add the width of the last course to the full width of a plank. Divide by two to find the width of the first and last course. Use a jigsaw to rip the first-course planks to this width. If you don’t need to rip down the first course, saw off their tongues to create an unobstructed expansion gap at the wall.
4. Install Cork Floor – First course
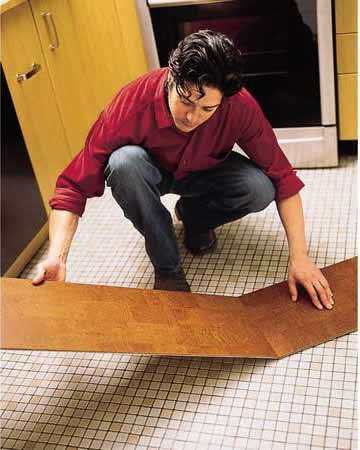
To piece the first course together, lift one plank off the floor at an angle of 45 degree, slide
its end into the end of another plank and gently press down until the tongue and the groove click together. Continue joining planks end to end until the first course is complete. If you need to cut the last piece to length, use a jigsaw guided by a clamped straightedge.
5. Insert spacers along the wall
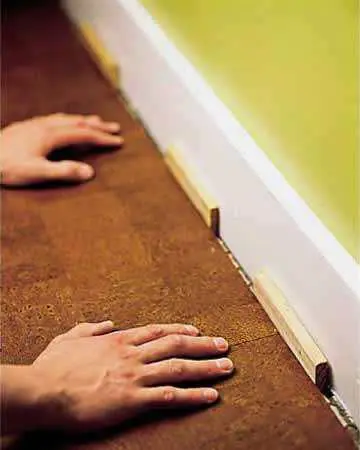
Place 1/2 inch spacers against the starting wall and slide the entire first course,
groove side facing toward you, tight against the spacers.
Tip: Since each plank is unique in color and pattern, sort through and consider how you match and group your flooring
6, Install Cork Floor – Rest Planks
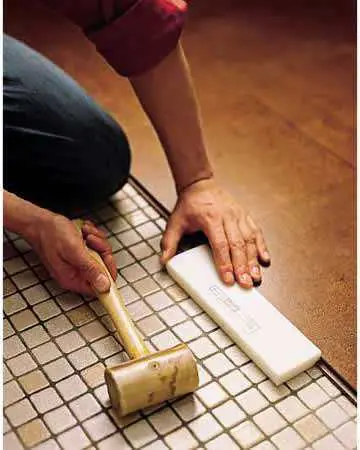
If you cut the last plank of cork flooring in the first course, and the leftover piece is longer than 10 inches, use it as the first piece in the second course. Set the cut end of the plank against a spacer at the end wall, then push the tongue of the plank against the first course.
Place a tapping block against the plank, fitting it around the groove. Use a hammer or mallet to tap block and coax the tongue and groove to click together. Install the next plank by clicking its end into the previous plank, then tapping it against the previous course. Continue install cork floor planks until you have filled the field.
Tip: To keep the floating floor from moving as you tap in the following courses, weight it down with the stacks of uninstalled planks.
7. Install the last course
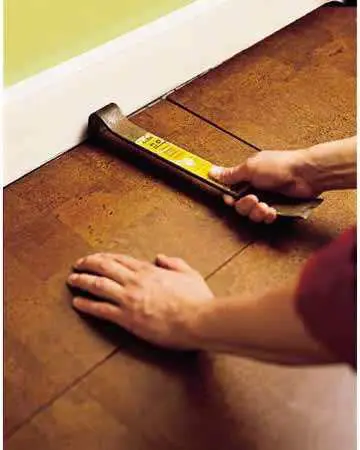
If necessary to fit the final course, rip down the cork flooring planks to width, taking away from the groove side. Remember to account for the 1/2-inch expansion gap.
Angle each piece into place and let it drop flat to the floor. To click and lock it to the previous row, hook it with a pry bar and pull the bar toward you.
Tip: Rent a table saw for cleaner, quicker cuts, especially if you’re flooring over a large area or more than one room.
Some tools you may wish to have on hand before beginning your project:
- Tape measure & pencil
- Rubber mallet
- Cat’s Paw or Pull Bar
- Tapping Block (you can use a piece of “waste” flooring with the tongue/groove in place)
- Circular Saw (many hardware stores carry “rental” equipment for do-it-yourself projects like this)
- Install cork flooring should be the final step after any other decoration work. Be sure the sub floor is completely dry, clean, flat, and sound before starting. Vacuum or sweep the floor thoroughly to get it free from dirt or any other substance.
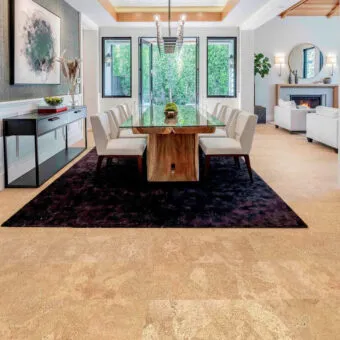 Flooring
 Wall & Ceiling Tiles
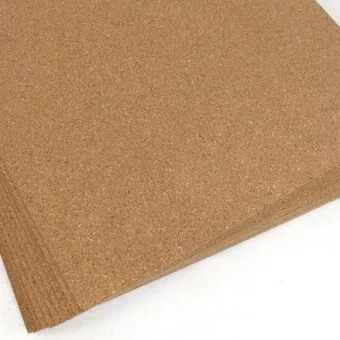 Cork Underlayment
 Supplies & Guides